Make Perfect Partners
Meeting Location Via Zoom Web Sites |
| Home |
| Cyndi's List |
| Family Graphics |
| LDS FamilySearch |
| Leister Productions |
| Macintosh Home |
| NARA (Pacific SF) |
| Reviews |
| Rootsweb | Sutro Library |
| The Magical Index - 23 Oct 2010 |
|
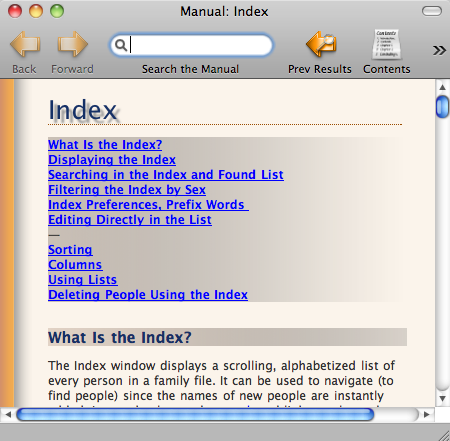
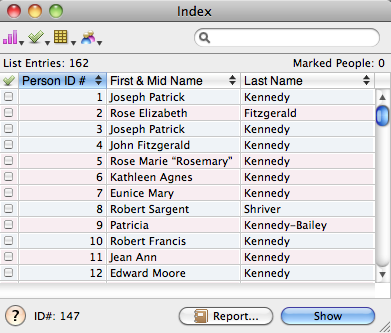
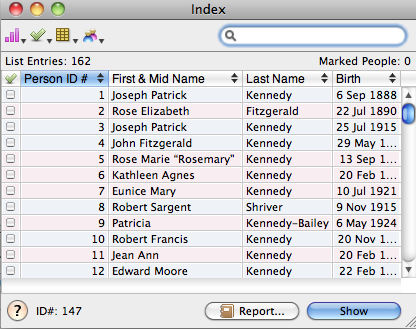
Reunion's index is a wonderful thing. It allows you to have control of your database by quickly generating customized lists. You will be able to construct lists of fields of any or all of the people in your Familyfile, print reports, create web pages or transfer information to spreadsheets. Before reading what I've written, let me mention Reunion's magnificent online User Manual. While in Reunion, after opening any familyfile, Click on the "Manual" tool on the Toolbar, then type in "index" in the "Search the Manual" input box and press ENTER. You should get a screen that looks like Fig 0. Any topic in Reunion is available using Reunion's online Manual. It is one of the best features of Reunion. I'd recommend using it often, to learn about a given topic in Reunion. I use it constantly. In it's simplest form the index provides you a list of all individuals in your database. To demonstrate, open the example Kennedy Familyfile. Then click the Index Icon on the toolbar and you should see something like Fig 1. There is a first column to allow you to mark or unmark people in your database. The other columns are customizeable. Your index should be sequenced by Person ID # (highlighted in blue). If it doesn't appear to be sorted properly, click on the top row, on the "Person ID #" column, to sequence the column, in ascending order. If they're in descending order click again. Experiment by also clicking on "First & Mid name" and "Last Name".
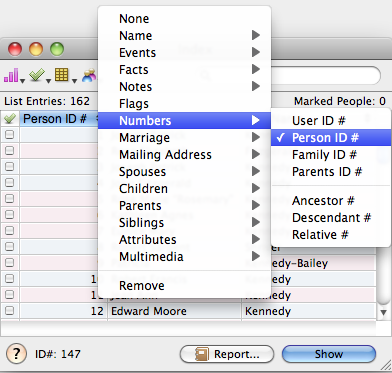
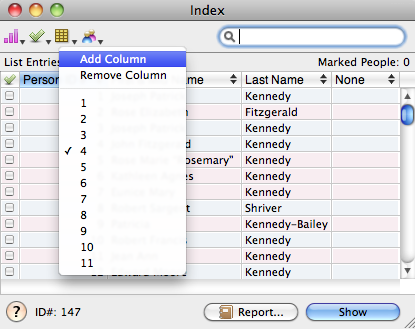
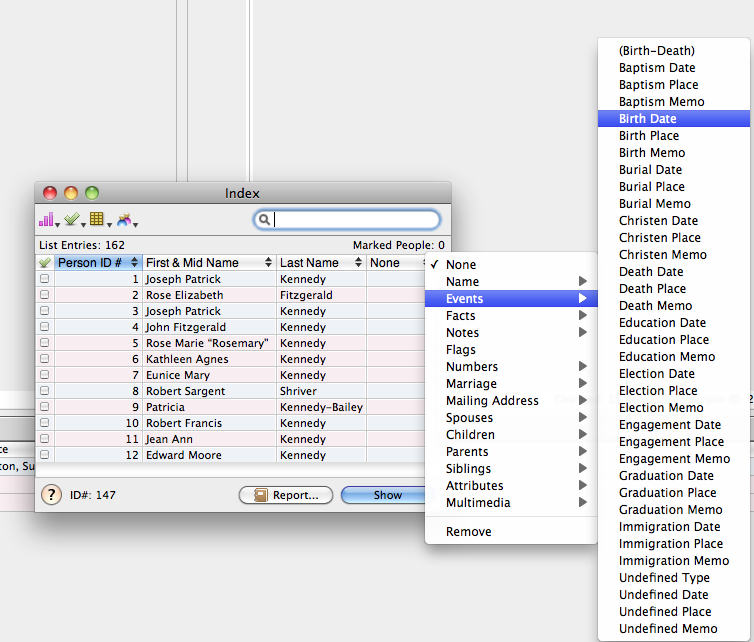
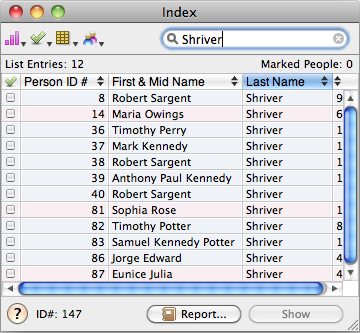
If you don't have the Person ID #, First & Mid Name and Last Name columns in your index, click on the up/down arrow in the top row of each column, and choose the correct data to be displayed in that column. For example, In the first data column you would click on the up/down arrow, then click on numbers, then click on Person ID as in Fig 2. Do similarly for the other two columns except begin by clicking on "Name". Now, let's say you want to add a birth date column. First, add a column to the list by clidking on the gold box with 12 squares in it and clicking add column. Now click on the up/down arrow in the 4th column that's currently blank, and choose events, and then, birth date as in Figure 4. You have now added a column to the index.You can have up to eleven colums of fields in one index, One other cool thing you can do with the index is list a subset of people. By typing "Shriver" in the search box at the top right of the dialog box, it will select only people with the surname of Shriver as shown in Fig 6.
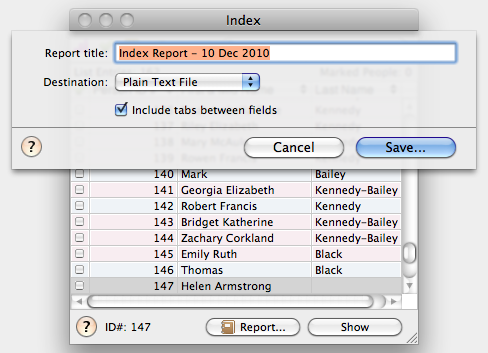
Now a last tip I'll show you is producing a report from the index which can be copied to a spreadsheet. To do this click on Report to produce Fig 7.
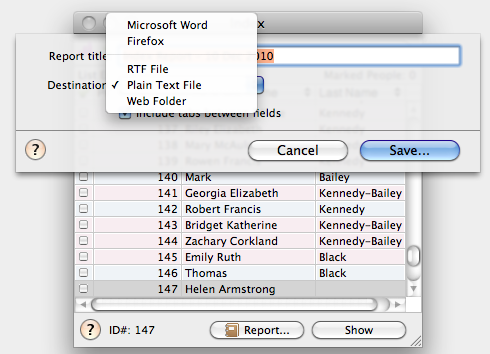
Now click on Destination to see all the choices you get. For this exercise, choose Plain Text file and make sure the "Include tabs between fields is checked" in fig 8.
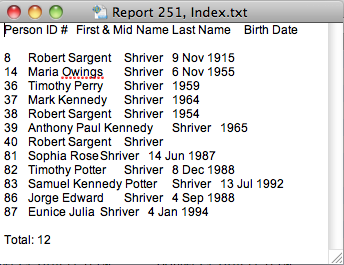
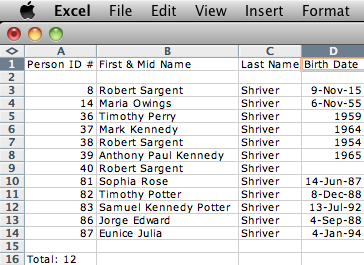
When you save the report (it is saved by default to the Reunion Reports folder) and view it with Textedit you should see something like Figure 9. Now, in addition to the other report types like Microsoft word, RTF, Web Folder (HTML) and Firefox, you can save it as a straight text file with tabs between fields. To finish off the exercize, select all this text and copy/paste it into a spreadsheet like Excel or Numbers, producing results like in Fig. 10. Pretty darn cool.!
|
Genealogical Societies California East Bay
Other Information There is one meeting a month, on the 2nd Wednesday on Zoom at 7pm, U.S. Pacific Standard Time. This meeting is an opportunity to get personalized help with Genealogy, Reunion, FamilySearch.org and your Macintosh. Become a member by attending a meeting and you'll be sent an announcement and reminder for the next Zoom meeting. Email Bill George if you would like to attend.
|
